Customizing Webflow Templates: Best Practices for Optimized Websites
Creating a stunning website no longer requires coding skills. Platforms like Webflow make it easy for beginners to start quickly. Customizing Webflow templates involves adapting a pre-designed layout to match your specific needs, adjusting colors, adding content, and ensuring it displays perfectly on every device. Of course, you will need a detailed guide to customize the template to your needs.
Through proper guidance, you’ll learn to choose the right design, make essential adjustments, and optimize for mobile and SEO. You’ll also be able to connect a domain and launch your site confidently. The goal is to help you create a professional online presence without feeling overwhelmed.
Features like responsive layouts, animations, and CMS options make it flexible and creative. These built-in tools save time while allowing you to design something unique. Let’s go through the process step by step.
Step 1: Browsing, Choosing, and Retrieving Your Webflow Template
The first stage of customizing Webflow templates is selecting one that suits your project’s goals. Webflow’s Template Marketplace is filled with professional designs for different industries and purposes. Here’s how beginners can navigate it effectively:
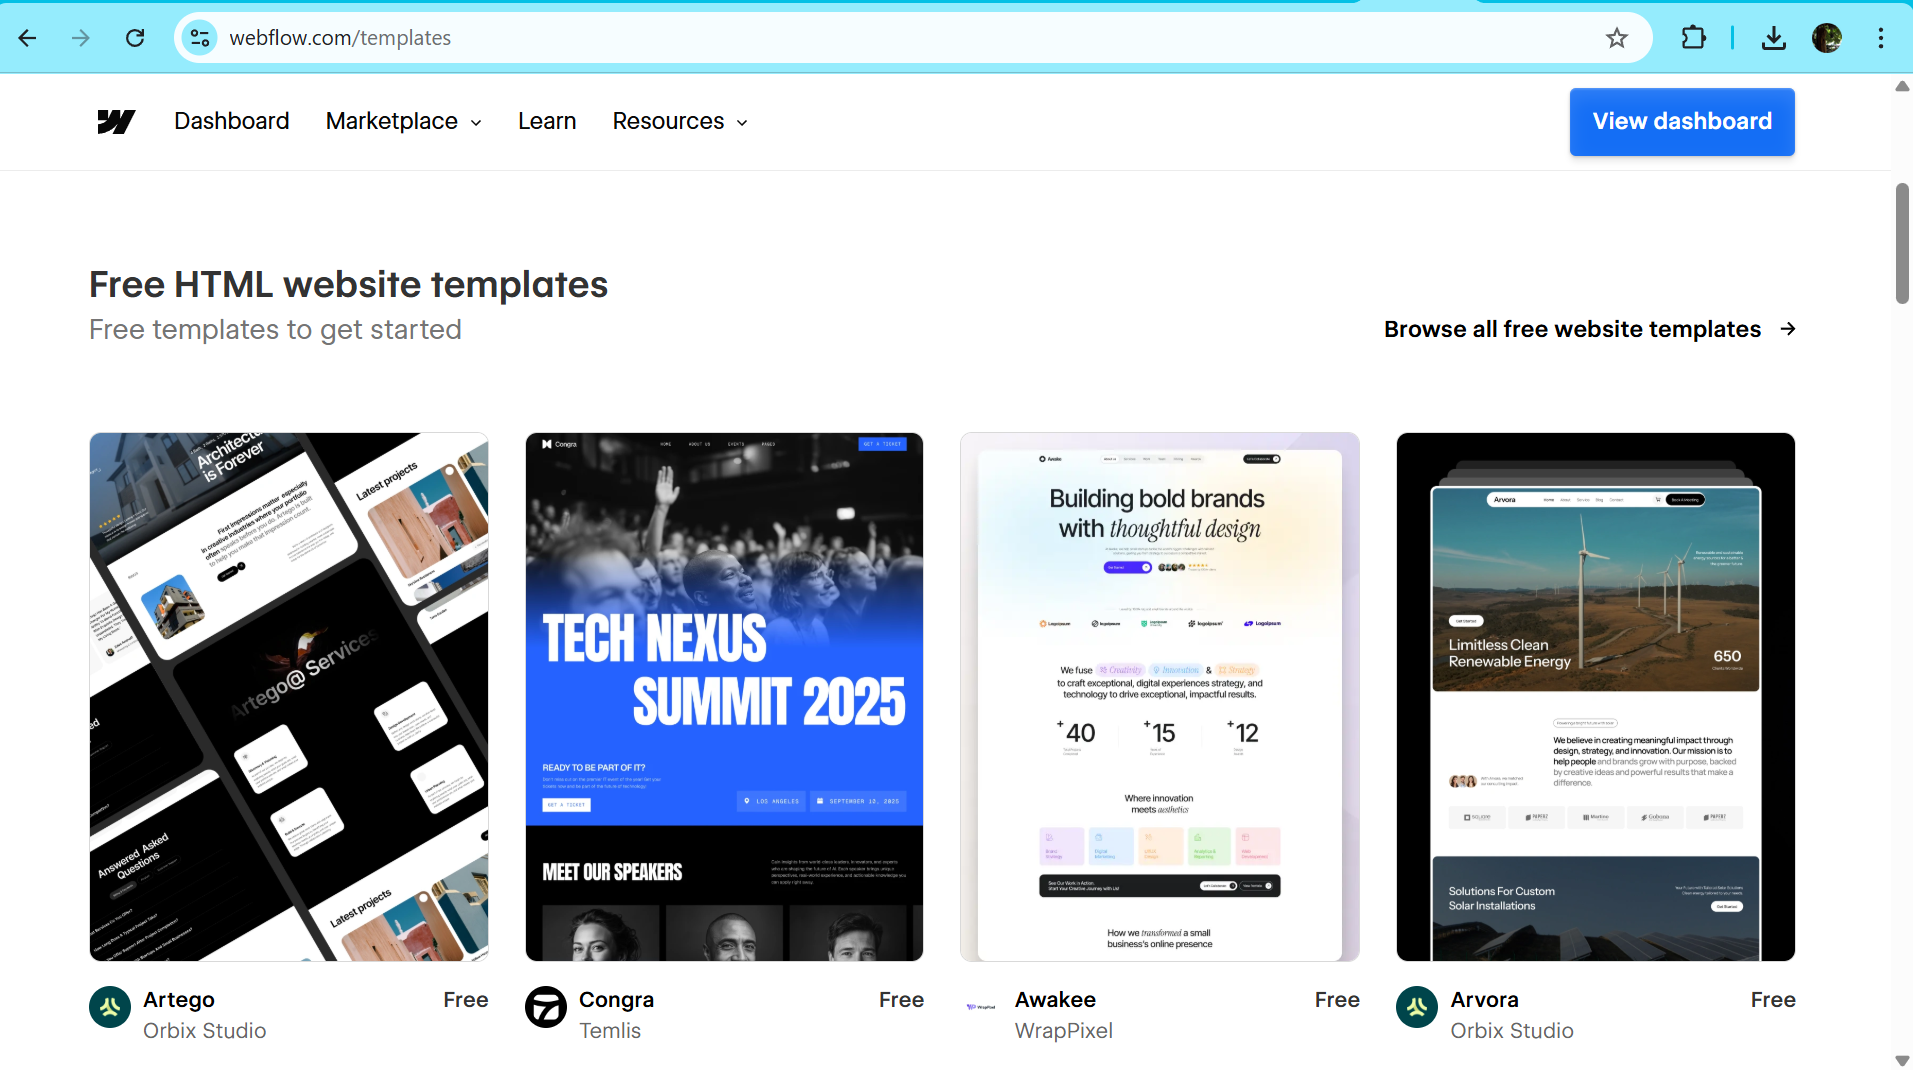
Search and find templates you need here
Navigate to the Webflow Template Marketplace: Visit webflow.com/templates and sign up for a free Webflow account if you haven’t already.
Explore free and premium templates: Free templates are ideal for testing ideas, while premium options offer more advanced features like e-commerce setups or animations.
Use filters to narrow down options: Select categories such as “Portfolio,” “Business,” or “E-commerce,” and sort by popularity or price.
Preview before you commit: Check how the template appears on desktop, tablet, and mobile, and picture how your changes could make it uniquely yours.
Once you choose a template, it will appear in your Webflow Dashboard, ready for customization.
Beginner tips: Before buying a premium template, select "Preview in Designer" to open it in Webflow's editing tool without committing. Play around to see if it's easy to customize.
Step 2: Making Basic Customizations in the Webflow Designer
This is where customizing Webflow templates becomes hands-on. Open your chosen template in the Webflow Designer, a visual editing space where you can drag, drop, and style elements without coding. For beginners, start slow: duplicate your site first as a backup (go to the Dashboard, select the site, and choose "Duplicate"). That way, you can experiment without worry.
Here's how to customize step by step.
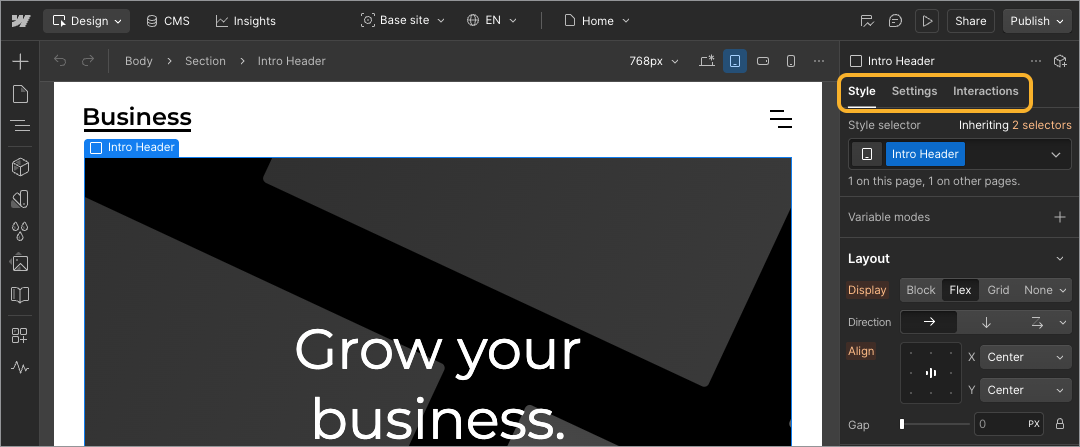
Right panels in Webflow editing panel: style, settings, interactions | Source: Webflow
Understand the interface: The Designer has panels on the sides. The left has the "Add" panel for new elements (like buttons or images), the right has style settings, and the middle is your canvas.
Update global styles: Most templates have a "Style Guide" page, find it in the Pages panel. Use it to make site-wide changes:
Change colors: Click on color swatches and pick ones that match your brand (e.g., blue for a calm vibe).
Select fonts: Choose easy-to-read options like sans-serif for body text.
Adjust typography: Make headings bigger or smaller for emphasis.
Edit content on pages: Go to the home page or any other page:
Replace text: Double-click placeholders and type your own words, like your business name or bio.
Add images: Upload your photos by dragging them into image elements. Delete anything you don't need.
Rearrange sections: Use the Navigator panel (looks like a folder tree) to drag blocks up or down.
Add or remove elements: If the template has too much:
Delete extras: Select an item and press delete.
Add new ones: From the Add panel, drag in a text block, form, or grid for layouts.
Work with dynamic content (if applicable): For blogs or stores, use the CMS tab:
Add items like blog posts by clicking "New Item."
Import data from a CSV file if you have a list ready (but check your plan's limits, free plans have fewer slots).
Add simple interactions: Make things interactive without code:
Hover effects: Select an element, go to Interactions, and set it to change color on mouseover.
Animations: Add fade-ins for page loads.
Remember, preview your changes often by clicking the eye icon. If something breaks, undo with Ctrl+Z (or Cmd+Z on Mac). Customizing Webflow templates here is all about trial and error; don't be afraid to play!
Step 3: Optimizing for Mobile and SEO
Your site needs to work well on phones and be findable on Google. Optimization ensures a smooth experience for visitors. Break it down like this:
Check mobile responsiveness: Use the breakpoint icons at the top (they look like device sizes):
Switch to mobile view and adjust layouts, make text larger or stack sections vertically.
Tweak padding and margins: Add space around elements so nothing feels cramped on small screens.
Test on tablet and desktop too for a seamless look everywhere.
Boost SEO basics: Go to Project Settings > SEO:
Edit meta titles: Make them descriptive, like "Your Business Name - Custom Portfolio Site."
Add meta descriptions: Write a short summary (150 characters) with keywords naturally.
Alt text for images: Right-click images and add descriptions like "Team photo at office" for better search and accessibility.
Improve loading speed: Slow sites frustrate users, so:
Compress images: Use free tools like TinyJPG to shrink files (keep width under 2500px).
Minimize code: In Publishing settings, turn off unused CSS/JS options.
Remove extras: Delete heavy elements you don't need.
These steps make customizing Webflow templates not just about looks, but performance too. Beginner tips: Test on your own phone by publishing a draft first.
Step 4: Connecting a Domain and Publishing
You're almost there! Publishing makes your site live. Follow these beginner steps:
Preview everything: In the Designer, click Preview to check:
Responsiveness on all devices.
Functionality: Click links, submit forms, and test buttons.
Publish to a Webflow subdomain: For a quick launch:
Click "Publish."
Your site goes live at something like yoursite.webflow.io, share this link right away.
Connect a custom domain: For a pro look (e.g., www.yourname.com):
Go to Project Settings > Hosting > Domains.
Buy a domain through Webflow or elsewhere (like GoDaddy).
Follow the instructions to connect—copy DNS records and paste them into your domain provider's settings.
Alternative: Export code: If you have a paid plan and want to host elsewhere:
Go to Project Settings > Code Export and download the files.
Final tests: After publishing:
Visit the live site and click around.
Fix any issues back in the Designer and republish.
Congratulations, your customizing Webflow templates journey is complete, and your site is now live!
Wrapping Up: Tips for Success as a Beginner
Creating a website can feel overwhelming, but starting small makes it manageable. Use built-in tutorials from Webflow University to guide you through each step. Join the Webflow community forum for inspiration and troubleshooting. Your first site may not be perfect, but every attempt builds valuable experience and confidence for future projects.
By following these clear steps, you’ll design a site that’s responsive, SEO-optimized, and uniquely suited to your needs. The process of customizing Webflow templates gives you creative control without requiring coding skills. Ready to begin? Visit the Template Marketplace, choose your design, and start building a professional online presence today. The world of web design is waiting for you.